SharedPreference를 대체하는 새로운 데이터 저장소인 DataStore가 나왔다.
DataStore는 Kotlin 코루틴 및 Flow를 사용하여 비동기적이고 일관된 트랜잭션 방식으로 데이터를 저장한다.
DataStore는 protocol buffers를 사용하는 크게 2가지 유형이 있다.
- key-value (Preference DataStore)
- typed objects (Proto DataStore)
이 2가지 DataStore는 아래의 차이가 있다.
Preference DataStore : SharedPreference와 마찬가지로 스키마를 정의하지 않고 키를 기반으로 데이터에 액세스 한다.
Proto DataStore : Protocol Buffer를 사용하여 스키마를 정의한다. Protobuf를 사용하기 때문에 강타입 데이터를 유지할 수 있다.
간단히 말하면 Preference DataStore는 기존의 SharedPreference와 같이 사용할 수 있고 Proto DataStore는 스키마를 정의하여 객체 자체를 저장할 수 있다. 단, 부분 업데이트나 참조 무결성은 지원하지 않기에 조금 더 복잡한 객체나 참조 무결성을 원하면 Room을 사용해야 한다.
다음은 DataStore와 SharedPreference가 어떻게 다른지 확인해 보자.

DataStore를 올바르게 사용하기 위해 다음을 유의해야 한다.
- 같은 프로세스에서 특정 파일의 DataStore를 2개 이상 만들지 않는다.
- DataStore의 일반 유형은 변경 불가능해야 한다.
- 동일한 파일에서 SingleProcessDataStore와 MultiProcessDataStore를 함께 사용하지 않습니다.
Preferences DataStore
Preferences DataStore를 사용하기 위해 다음과 같이 Dependency를 설정해 준다.
dependencies {
    //Preferences DataStore
    implementation("androidx.datastore:datastore-preferences:1.0.0")
    //Proto DataStore
    implementation("androidx.datastore:datastore:1.0.0")
}
전체 코드는 다음과 같다.
class MainActivity : AppCompatActivity() {

    //Preferences DataStore 정의
    private val dataStore: DataStore<Preferences> by preferencesDataStore(name = "settings")

    //어떤 값의 Key로 만들지 설정
    private val counter = intPreferencesKey("counter")

    override fun onCreate(savedInstanceState: Bundle?) {
        super.onCreate(savedInstanceState)
        setContentView(R.layout.activity_main)

        //Preferences DataStore 읽기
        val exampleCounterFlow: Flow<Int> = this.dataStore.data.map { preferences ->
            preferences[counter] ?: 0
        }

        lifecycleScope.launch {
            incrementCounter()

            exampleCounterFlow.collect {
                Log.d("DataStoreResult", it.toString())
            }
        }
    }

    suspend fun incrementCounter() {
        this.dataStore.edit { settings ->
            val currentCounterValue = settings[counter] ?: 0
            settings[counter] = currentCounterValue + 100

        }
    }

}
Preference DataStore를 만들기 위해서는 해당 DataStore와 Key가 필요하다. 그게 다음 2줄이다.
private val dataStore: DataStore<Preferences> by preferencesDataStore(name = "settings")
private val counter = intPreferencesKey("counter")
intPreferencesKey는 int값의 Key를 만들기 위한 메서드이다.
이외에도 아래와 같은 메서드들이 있다.
아마 주로 아래 함수들을 자주 사용하지 않을까 싶다.
stringPreferencesKey(name: String)booleanPreferencesKey(name: String)stringSetPreferencesKey(name: String)
//Preferences DataStore 읽기
val exampleCounterFlow: Flow<Int> = this.dataStore.data.map{preferences->
preferences[counter] ?: 0
}
위와 같은 방식으로 비동기 방식으로 읽기 위해 Flow를 사용해 준다.
만약 데이터를 저장하고 싶다면 아래와 같이 적용하면 된다. suspend 함수 안에서 edit를 통해서 해당 값을 가져온 후 재정의 해도 되고 아예 새롭게 정의해도 된다.
suspend fun incrementCounter() {
        this.dataStore.edit { settings ->
            val currentCounterValue = settings[counter] ?: 0
            settings[counter] = currentCounterValue + 100

        }
    }
비동기 처리를 위해 lifecycleScope를 사용했다.
lifecycleScope.launch {
            incrementCounter()

            exampleCounterFlow.collect {
                Log.d("DataStoreResult", it.toString())
            }
        }
로그를 확인하면 다음과 같은 값을 얻을 수 있다. 만약 재실행을 한다면 100이 또 증가하여 200이 저장될 것이다.

Proto DataStore
Poroto DataStore를 사용하기 위해서는 Preference DataStore보다 많은 설정이 필요하다.
Proto Datastore에서 스키마용 코드 생성을 위해서 Protobuf를 사용하는데 다음과 같은 작업으로 build.gradle 파일을 조금 변경해야 합니다. (Module 수준의 build.gradle에서 변경해야 한다.)
- Protobuf 플러그인 추가
- Protobuf 및 Proto Datastore 종속 항목 추가
- Protobuf 구성
plugins {
    ...
    id "com.google.protobuf" version "0.8.17"
}

dependencies {
    implementation  "androidx.datastore:datastore-core:1.0.0"
    implementation  "com.google.protobuf:protobuf-javalite:3.18.0"
    ...
}

protobuf {
    protoc {
        artifact = "com.google.protobuf:protoc:3.14.0"
    }

    // Generates the java Protobuf-lite code for the Protobufs in this project. See
    // https://github.com/google/protobuf-gradle-plugin#customizing-protobuf-compilation
    // for more information.
    generateProtoTasks {
        all().each { task ->
            task.builtins {
                java {
                    option 'lite'
                }
            }
        }
    }
}
이후에는 app/src/main/proto 안에 proto파일을 만든다.

syntax = "proto3";

option java_package = "com.codelab.android.datastore";
option java_multiple_files = true;

message UserPreferences {
  // filter for showing / hiding completed tasks
  bool show_completed = 1;
}- syntax : protocol buffer 3버전을 사용한다고 명시
- option java_multiple_files :true로 설정 시 top-level 메세지, 서비스, enum에 대해 각각의 .java 파일을 만들어준다. (기본 값은 false이다. 이때는 오직 하나의 .java 파일만을 생성한다.)
- option java_package : message를 통해 만들어지 class가 생성될 package명을 명시
- message : 데이터 구조를 정의 (이 구조를 가지고 java class를 만든다.)
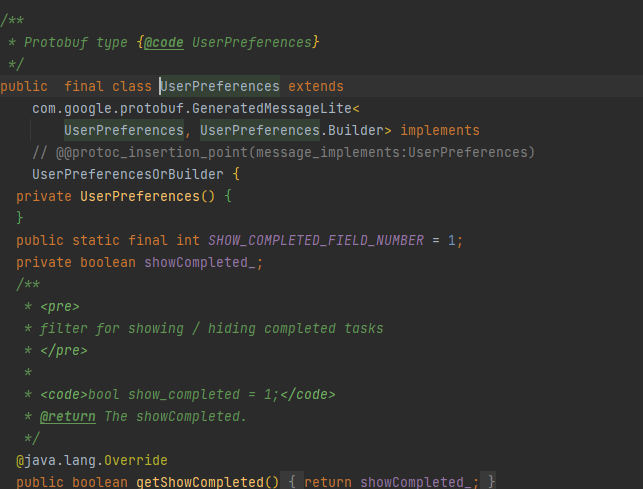
이후에 Project를 Rebuild를 해주면 message가 java class를 자동으로 만들어준다.

만들어진 java class를 Datastore가 역직렬화 및 직렬화 과정이 필요해서 Serializer를 생성해야 한다. 이는 아래와 같이 직접 구현하면 된다.
object UserPreferencesSerializer : Serializer<UserPreferences> {
    override val defaultValue: UserPreferences = UserPreferences.getDefaultInstance()
    override suspend fun readFrom(input: InputStream): UserPreferences {
        try {
            return UserPreferences.parseFrom(input)
        } catch (exception: InvalidProtocolBufferException) {
            throw CorruptionException("Cannot read proto.", exception)
        }
    }

    override suspend fun writeTo(t: UserPreferences, output: OutputStream) = t.writeTo(output)
}- readForm : 역직렬화 수행 함수
- writeTo : 직렬화 수행 함수
이제 Proto DataStore를 쓰기 위한 준비는 끝났다. 아래는 Proto DataStore를 쓰는 전체 코드이다.
class MainActivity : AppCompatActivity() {

    private val protoDataStore: DataStore<UserPreferences> by dataStore(
        fileName = "userPreference.pb",
        serializer = UserPreferencesSerializer
    )

    override fun onCreate(savedInstanceState: Bundle?) {
        super.onCreate(savedInstanceState)
        setContentView(R.layout.activity_main)

        val example: Flow<UserPreferences> = protoDataStore.data

        lifecycleScope.launch {
            updateShowCompleted(true)

            example.collect {
                Log.d("DataStoreResult", it.showCompleted.toString())
            }
        }
    }

    suspend fun updateShowCompleted(completed: Boolean) {
        protoDataStore.updateData { preferences ->
            preferences.toBuilder().setShowCompleted(completed).build()
        }
    }
}
우선 Proto DataStore는 다음과 같이 생성해 주면 된다.
 private val protoDataStore: DataStore<UserPreferences> by dataStore(
        fileName = "userPreference.pb",
        serializer = UserPreferencesSerializer
    )
생성을 위해 2가지가 필요하다.
- DataStore의 파일 이름 설정 (정해져 있지는 않다.)
- 직렬화와 역직렬화를 수행할 serializer (우리가 만든 serializer를 사용)
Preference DataStore처럼 Flow로 읽어오기 위해 다음과 같이 작성했다.
val example: Flow<UserPreferences> = protoDataStore.data
그리고 이후 클래스의 내부의 속성값을 변경하기 위해 suspend 함수를 만들어준다.
   suspend fun updateShowCompleted(completed: Boolean) {
        protoDataStore.updateData { preferences ->
            preferences.toBuilder().setShowCompleted(completed).build()
        }
    }
마찬가지로 lifecyclescope로 비동기 실행을 해주어 결과를 확인해 보자.
  lifecycleScope.launch {
            updateShowCompleted(true)

            example.collect {
                Log.d("DataStoreResult", it.showCompleted.toString())
            }
        }
결과는 아래와 같이 나온다.

Reference
'개발 > Android' 카테고리의 다른 글
| [Android] MVVM 패턴 및 Clean Architecture, Android Jetpack 적용 예제 (0) | 2022.11.02 |
|---|---|
| [Android] 여러 개의 LiveData를 한번에 핸들링하는 MediatorLiveData (0) | 2022.10.13 |
| [Android] 두 개의 RecyclerView 사이에서 Drag and Drop 구현하기 (2) | 2022.09.17 |
| [Android] 런처앱(Launcher app)에서 Widget 생성하기 (0) | 2022.09.01 |
| [Android] DataBinding이란? (0) | 2022.08.14 |


댓글